


Concluding our series for tips for stable measurements using microbalances with A&D Weighing, here are tips 7 thru 12. To catch up on the previous tips, visit the posts below:
Tip #7:
Minimize convection flows inside the weighing chamber.
Why?
If, for example, you bring in a weighing sample from another location and measure it right away, there may be a difference in temperature between the sample and its surroundings.
When the temperature of the sample is higher, a layer of ascending warm air will be generated around it, which will then push the sample upward and make the value appear lighter, as shown by Figure 3. (Conversely, when it is lower, the value will appear heavier.)
As the sample cools down and the convection flow becomes weaker, the display value will gradually increase, making the measurement unstable.
In addition, a convection flow can occur when you open the door to the weighing chamber and replace the air inside. This will bring faint changes in temperature to the chamber and become another factor for drift and poor repeatability. Putting your hand into the weighing chamber will also disturb the temperature in the chamber.
Solution
Leave the weighing sample and container near the microbalance, or inside the balance on the shelf, for a sufficiently long time for acclimatization to occur before starting measurements.
When placing the weighing sample on the pan, open the door only to a minimum degree, and close it gently but swiftly.
Never grab the sample or container with your hand. Instead, use tweezers that are long enough to reach the pan area without having to put your hand in.

Tip #8
Protect the microbalance from your body heat and breath.
Why?
Heat emitted from your body or conveyed by your breath can affect the weighing sensor and cause values to drift. Your breath, if strong, can also create airflows and destabilize measurements.
Solution
Only draw as close to the microbalance as is necessary. Take measures to contain your body heat such as wearing a lab coat and mask. Avoid performing measurements immediately after meals, after which your body heat increases. The best measure is to put an external breeze break (draft shield) such as the AD-1672 over the microbalance.

Tip #9
Avoid impacts or tremors to the sensor.
Why?
Sensor shocks result in variations in the zero point and reduced repeatability.
Solution
Do not open or close the doors roughly causing an impact. Avoid poking the weighing pan with tweezers or dropping the sample on the pan.
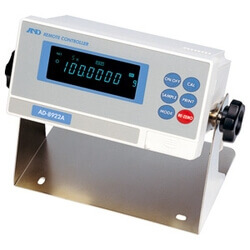
Press keys gently, or ideally, use a remote controller. The AD-8922A is recommended when the microbalance is on an anti-vibration table, as any vertical force can tilt the balance leading to inaccuracies.
It is also advised to perform “pre-loading” – placing a weight once or twice before starting actual measurements – to allow the weight sensor a break-in period.

Tip #10
Use the internal calibration of the microbalance for a quick check of the environmental conditions at the time
Count the number of seconds required to complete the internal calibration. If it took longer than usual, it is a sign that there is something wrong with the measurement environment and it would be best to delay the measurement until a later time.
Alternatively, with A&D’s BM-20/22 microbalances, it is possible to run an automatic repeatability test, which automatically measures the internal calibration weight (approx. 20 g) 10 times and calculates repeatability (standard deviation), to inspect the performance under the given environment.

Tip #11
Set a consistent time interval for reading the display value
Microbalances can exhibit slightly different behavior depending on the measurement conditions, including the operator at the time. Using a stopwatch, decide how many seconds after placing the sample you find it most comfortable to record the display value. If it was, say, 20 seconds, then always read the values after 20 seconds for all further measurements as well.
Measured this way, microbalances will provide more repeatable, reliable results.
When the sample is powder, adding it to a weigh boat should be done outside the microbalance in order to maintain the same interval as well as to prevent cross-contamination inside the weighing chamber.
Tip #12
Disable the zero-tracking function when the amount to be weighed is 100μg or below
When the sample placed is lighter than 100μg, the measured value increases so slowly that if the zero tracking is active the microbalance may judge it to be a drifting of the zero point. As a result, the display value will remain zero.
Please note that without zero tracking the zero-point drift is visible on the display. It is therefore recommended to re-zero the balance immediately before each measurement.
Thus concludes the series for stable measurements with A&D Weighing, be sure to explore all of their scales and balances through MISUMI here.


